
Creating your own DIY nail designs can be a delightful and cost-effective way to express your creativity while maintaining stylish and cute nails. Equipped with basic materials such as various nail polish colors, art brushes, stickers, and more, you can embark on a journey to personalize your nail art. From classic polka dots and pastel ombre to intricate floral patterns and trendy animal prints, the possibilities are endless. Whether you’re a fan of cartoon characters, whimsical unicorn themes, or charming ice cream cone designs, the world of cute nail art awaits your exploration.
If you prefer to leave the artistic endeavor to professionals, nail designs are offered at salons with pricing that varies based on factors such as complexity, the expertise of technicians, and geographical location. Basic designs may be included in standard manicure costs, while more elaborate and personalized options, including gel or acrylic extensions with intricate artwork, might incur additional charges. Ultimately, whether you opt for a DIY approach or seek professional services, adorable and stylish nails are within reach. Now, let’s delve into the world of cute nail designs and unleash your creative flair!
How to DIY nail designs?
DIY nail designs can be a fun and creative way to express yourself. Here’s a simple guide to help you get started:
Materials Needed:
- Nail polish in various colors
- Base coat and top coat
- Nail art brushes or toothpicks
- Nail stickers or stencils
- Nail file and buffer
- Cotton swabs and nail polish remover
- Small dish of water (for water marble designs, optional)
Step-by-Step Guide:
-
Prepare Your Nails:
- Start with clean, dry nails.
- Use a nail file to shape your nails and a buffer to smooth the surface.
- Apply a base coat to protect your natural nails and help the polish adhere better.
-
Choose Your Colors:
- Select the nail polish colors you want to use for your design.
-
Basic Techniques:
- Solid Colors: Apply one or two coats of your chosen color and let it dry completely.
- Gradient: Apply two or more colors on a makeup sponge and dab it onto your nails for a gradient effect.
- French Manicure: Use tape or nail guides to create clean lines for a classic French manicure.
-
Nail Art Brushes or Toothpicks:
- Use fine-tipped nail art brushes or toothpicks to create intricate designs.
- Dip the brush/toothpick into the nail polish and carefully draw your design.
-
Stickers or Stencils:
- Apply nail stickers or use stencils for more intricate designs.
- Place the sticker/stencil on the nail and press it down gently. Paint over it and then carefully remove the sticker/stencil.
-
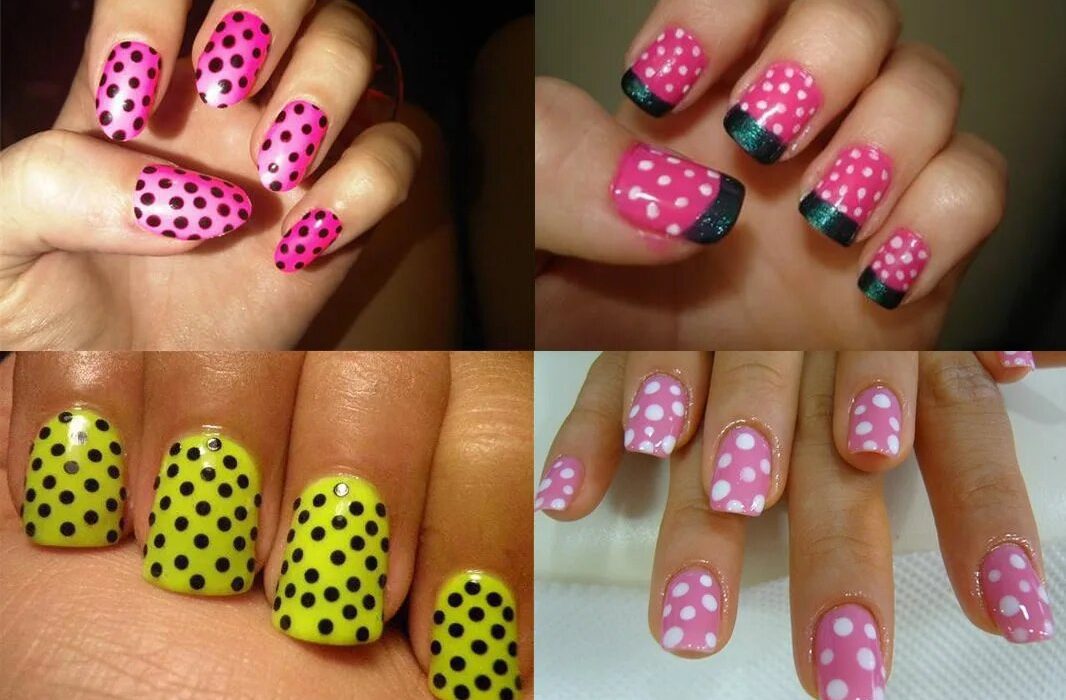
Dotting Tool:
- Create dots using a dotting tool or the end of a bobby pin for a polka-dot design.
-
Water Marble (Optional):
- Fill a small dish with water.
- Drop different nail polish colors into the water, creating concentric rings.
- Use a toothpick to create a design in the polish.
- Dip your nail into the design on the water’s surface, and clean up the excess polish.
-
Top Coat:
- Once your design is dry, apply a top coat to seal and protect your nail art.
-
Clean-Up:
- Use a cotton swab dipped in nail polish remover to clean up any mistakes around the nail.
-
Experiment and Have Fun:
- Don’t be afraid to experiment with different colors and designs.
- Practice makes perfect, so keep trying and refining your technique.
Remember, the key is to be patient and have fun with the process. Don’t worry if your designs aren’t perfect at first – practice will help you improve over time.
What are some cute nail designs?
Here are some cute nail design ideas that you can try:
-
Polka Dots:
- Create a playful look by adding colorful polka dots on a light-colored base.
-
Pastel Ombre:
- Blend different pastel shades together for a soft and gradient effect.
-
Heart Accents:
- Paint your nails in a solid color and add small heart accents on one or two nails.
-
Floral Patterns:
- Paint delicate flowers on a neutral or pastel base for a cute and feminine touch.
-
Rainbow Stripes:
- Create a rainbow stripe pattern across your nails for a vibrant and cheerful look.
-
Cartoon Characters:
- Showcase your favorite cartoon characters with detailed nail art.
-
Animal Print:
- Try leopard or zebra print for a trendy and cute animal-inspired design.
-
Candy Colors:
- Use bright and sweet candy colors to create a playful and fun manicure.
-
Watermelon Nails:
- Paint your nails in a watermelon pattern with green, pink, and black colors.
-
Unicorn Nails:
- Embrace the magical vibes with pastel colors, glitter, and unicorn horn accents.
-
Ice Cream Cone:
- Paint your nails to look like different flavored ice cream cones for a sweet touch.
-
Cute Characters:
- Create miniature versions of cute characters like pandas, cats, or bears.
-
Rainbow Hearts:
- Paint a rainbow of hearts on a white or light-colored background.
-
Cupcake Nails:
- Decorate your nails with tiny cupcakes for an adorable and delicious look.
-
Mermaid Scales:
- Achieve a mermaid-inspired look by painting scales in iridescent colors.
-
Sunflower Design:
- Paint sunflowers on a yellow background for a bright and cheerful design.
-
Penguin Nails:
- Create cute penguin characters with black and white nail polish.
-
Cherry Blossoms:
- Paint delicate cherry blossoms on a pastel base for a sophisticated and cute design.
-
Puzzle Pieces:
- Connect puzzle pieces on each nail for a unique and playful design.
-
Daisy Chain:
- Create a daisy chain pattern for a simple yet cute floral look.
Feel free to mix and match these ideas or add your own creative twist to create a unique and adorable nail design!